
Is that a wrap? Shadow wrap short rows

During my evolution as a knitter, I had always dreaded the short row or wrap-and-turn. I found myself avoiding patterns that called for any type of short row. I always knew that I would be disappointed in the finished project, because the wrap-and-turn method would just not look neat enough.
Once I began writing my own patterns, I was determined to find a better way to work short rows. They are just so versatile and give the designer a lot of options when it comes to shaping. My research led me from the standard wrap & turn method (either picking up or leaving wraps) to German short rows and Japanese short rows. I do believe I looked up all possible short row methods and was always disappointed with the results. In the end I found that the "shadow wrap" (AKA "twin stitch") short row method was the neatest looking, as well as the easiest to knit.
Since discovering the shadow wrap method, it is the only method I have used and the only method I recommend in my patterns. Therefore, I thought it might be high time to make my own photo tutorial to refer back to.
Working a shadow wrap knit wise vs. purl wise
What does this mean exactly? Knit wise or Purl wise? Well, let me tell you! When using the shadow wrap method, it doesn't matter if you are knitting the right side or the wrong side of the fabric. How the "to-be-wrapped" stitch presents itself determines how that stitch is wrapped. So, if it is a knit stitch you will be working a shadow wrap knit wise; if it is a purl stitch, you will be working a shadow wrap purl wise.
What is this tutorial teaching me?
This tutorial will describe the individual skills needed to work shadow wrap short rows. These skills are: creating a shadow wrap & turn on a knitted stitch, creating a shadow wrap & turn on a purled stitch, working the shadow wrap of a knitted stitch, and working the shadow wrap of a purled stitch. How these skills are put into practice varies from design to design. Which means that every knitting pattern will have you working short rows in various ways. Some will have you work a wrap every single stitch while others will call for wraps every 3rd stitch. There are patterns that have wraps on both ends of the fabric, and others where only knitted wraps are required. Then there are designs with shaping that requires you to work the wraps all at once, while others have you working the wraps one at a time. It all depends on how the designer intends the length-wise shaping to occur.So let's get to learning our new skill set!
Creating a shadow wrap on a knitted stitch (shadow wrap knit wise)
Step 1: Work until you reach the stitch which is to be wrapped. It should be the next stitch on your left needle.

Step 2: With your right needle, pick up the right leg of the knitted stitch from the previous row and place it on the left needle.


Step 3: Knit into the new loop on the left needle, to create the "shadow stitch".


Step 4: Slip the remaining loop of the original "to-be-wrapped" stitch from the left needle to the right needle, as if to purl. Turn your work.
Step 5: Slip the two loops of the wrapped stitch from the left needle to the right, as if to purl.The next stitch on the left needle should be worked as normal, in the manner described in your pattern. In the example swatch, it would be a purl stitch/row.


Creating a shadow wrap on a purled stitch (shadow wrap purl wise)
Step 1: Work until you reach the stitch which is to be wrapped. It should be the next stitch on your left needle.

Step 2: Slip the "to-be-wrapped" stitch from the left needle to the right, as if to purl.

Step 3: Pick up the purl bump of the slipped stitch and place it on the left needle. Do this by inserting your left needle from bottom to top into the bump.


Step 4: Now purl this new loop from the left needle and turn your work.


Step 5: Slip the two loops of the wrapped stitch from the left needle to the right, as if to purl.

The next stitch on the left needle should be worked as normal, in the manner described in your pattern. In the example swatch, it would be a knit stitch/row.
Now, at some point in your knitting, you are going to have to deal with the shadow wraps you have left behind on your needle. This is where most short row methods are lacking. If you pick up the wrap in the standard wrap & turn method, if you are not practiced, you often end up with uneven stitches and holes in your work. An alternative to picking up the wraps would be to leave them be. However, I find the remaining wraps to be very distracting to the eye. Neither of these solutions seems acceptable to me. The shadow wrap method solves these problems with a very simple solution: there are absolutely no wraps to pick up! Now you will learn how to simply and neatly integrate the shadow wraps into your knitting.
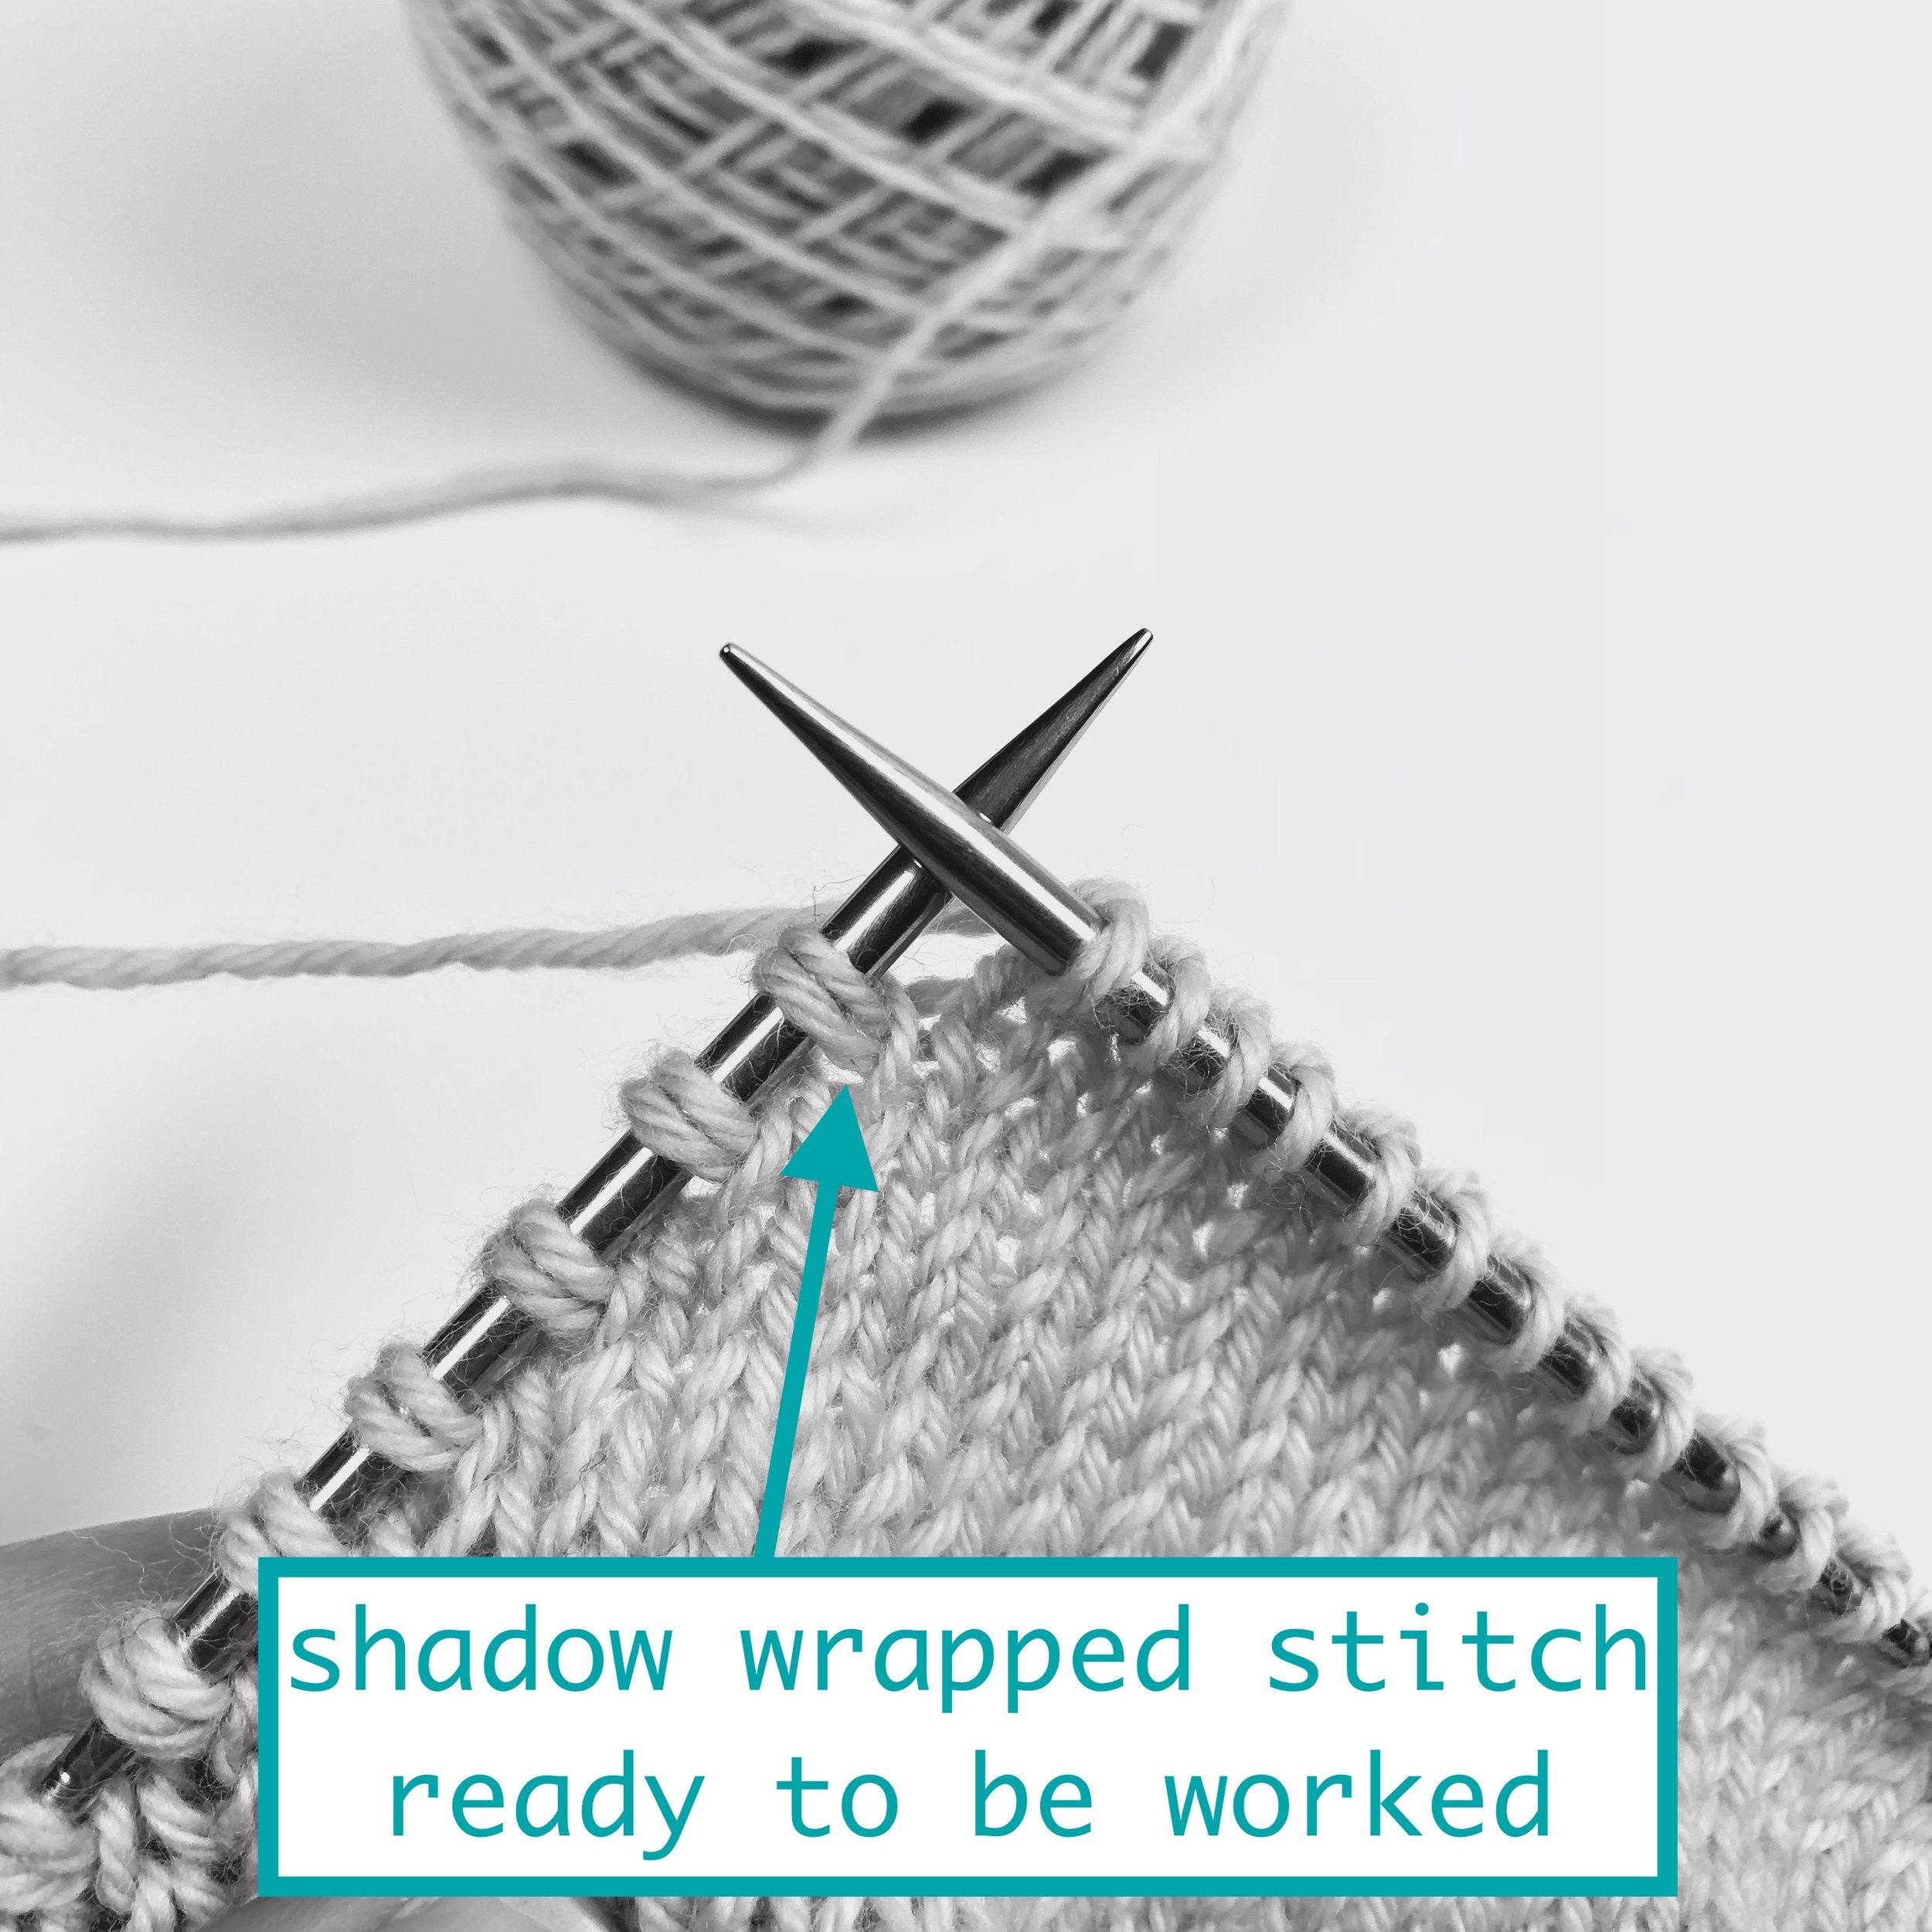
Working the shadow wrap of a knitted stitch
Work in the pattern as described until you reach a shadow wrapped stitch. Keep an eye out for the "double looped" stitch. Now, working the shadow wrapped stitch is as simple as knitting those two loops together! That's It!

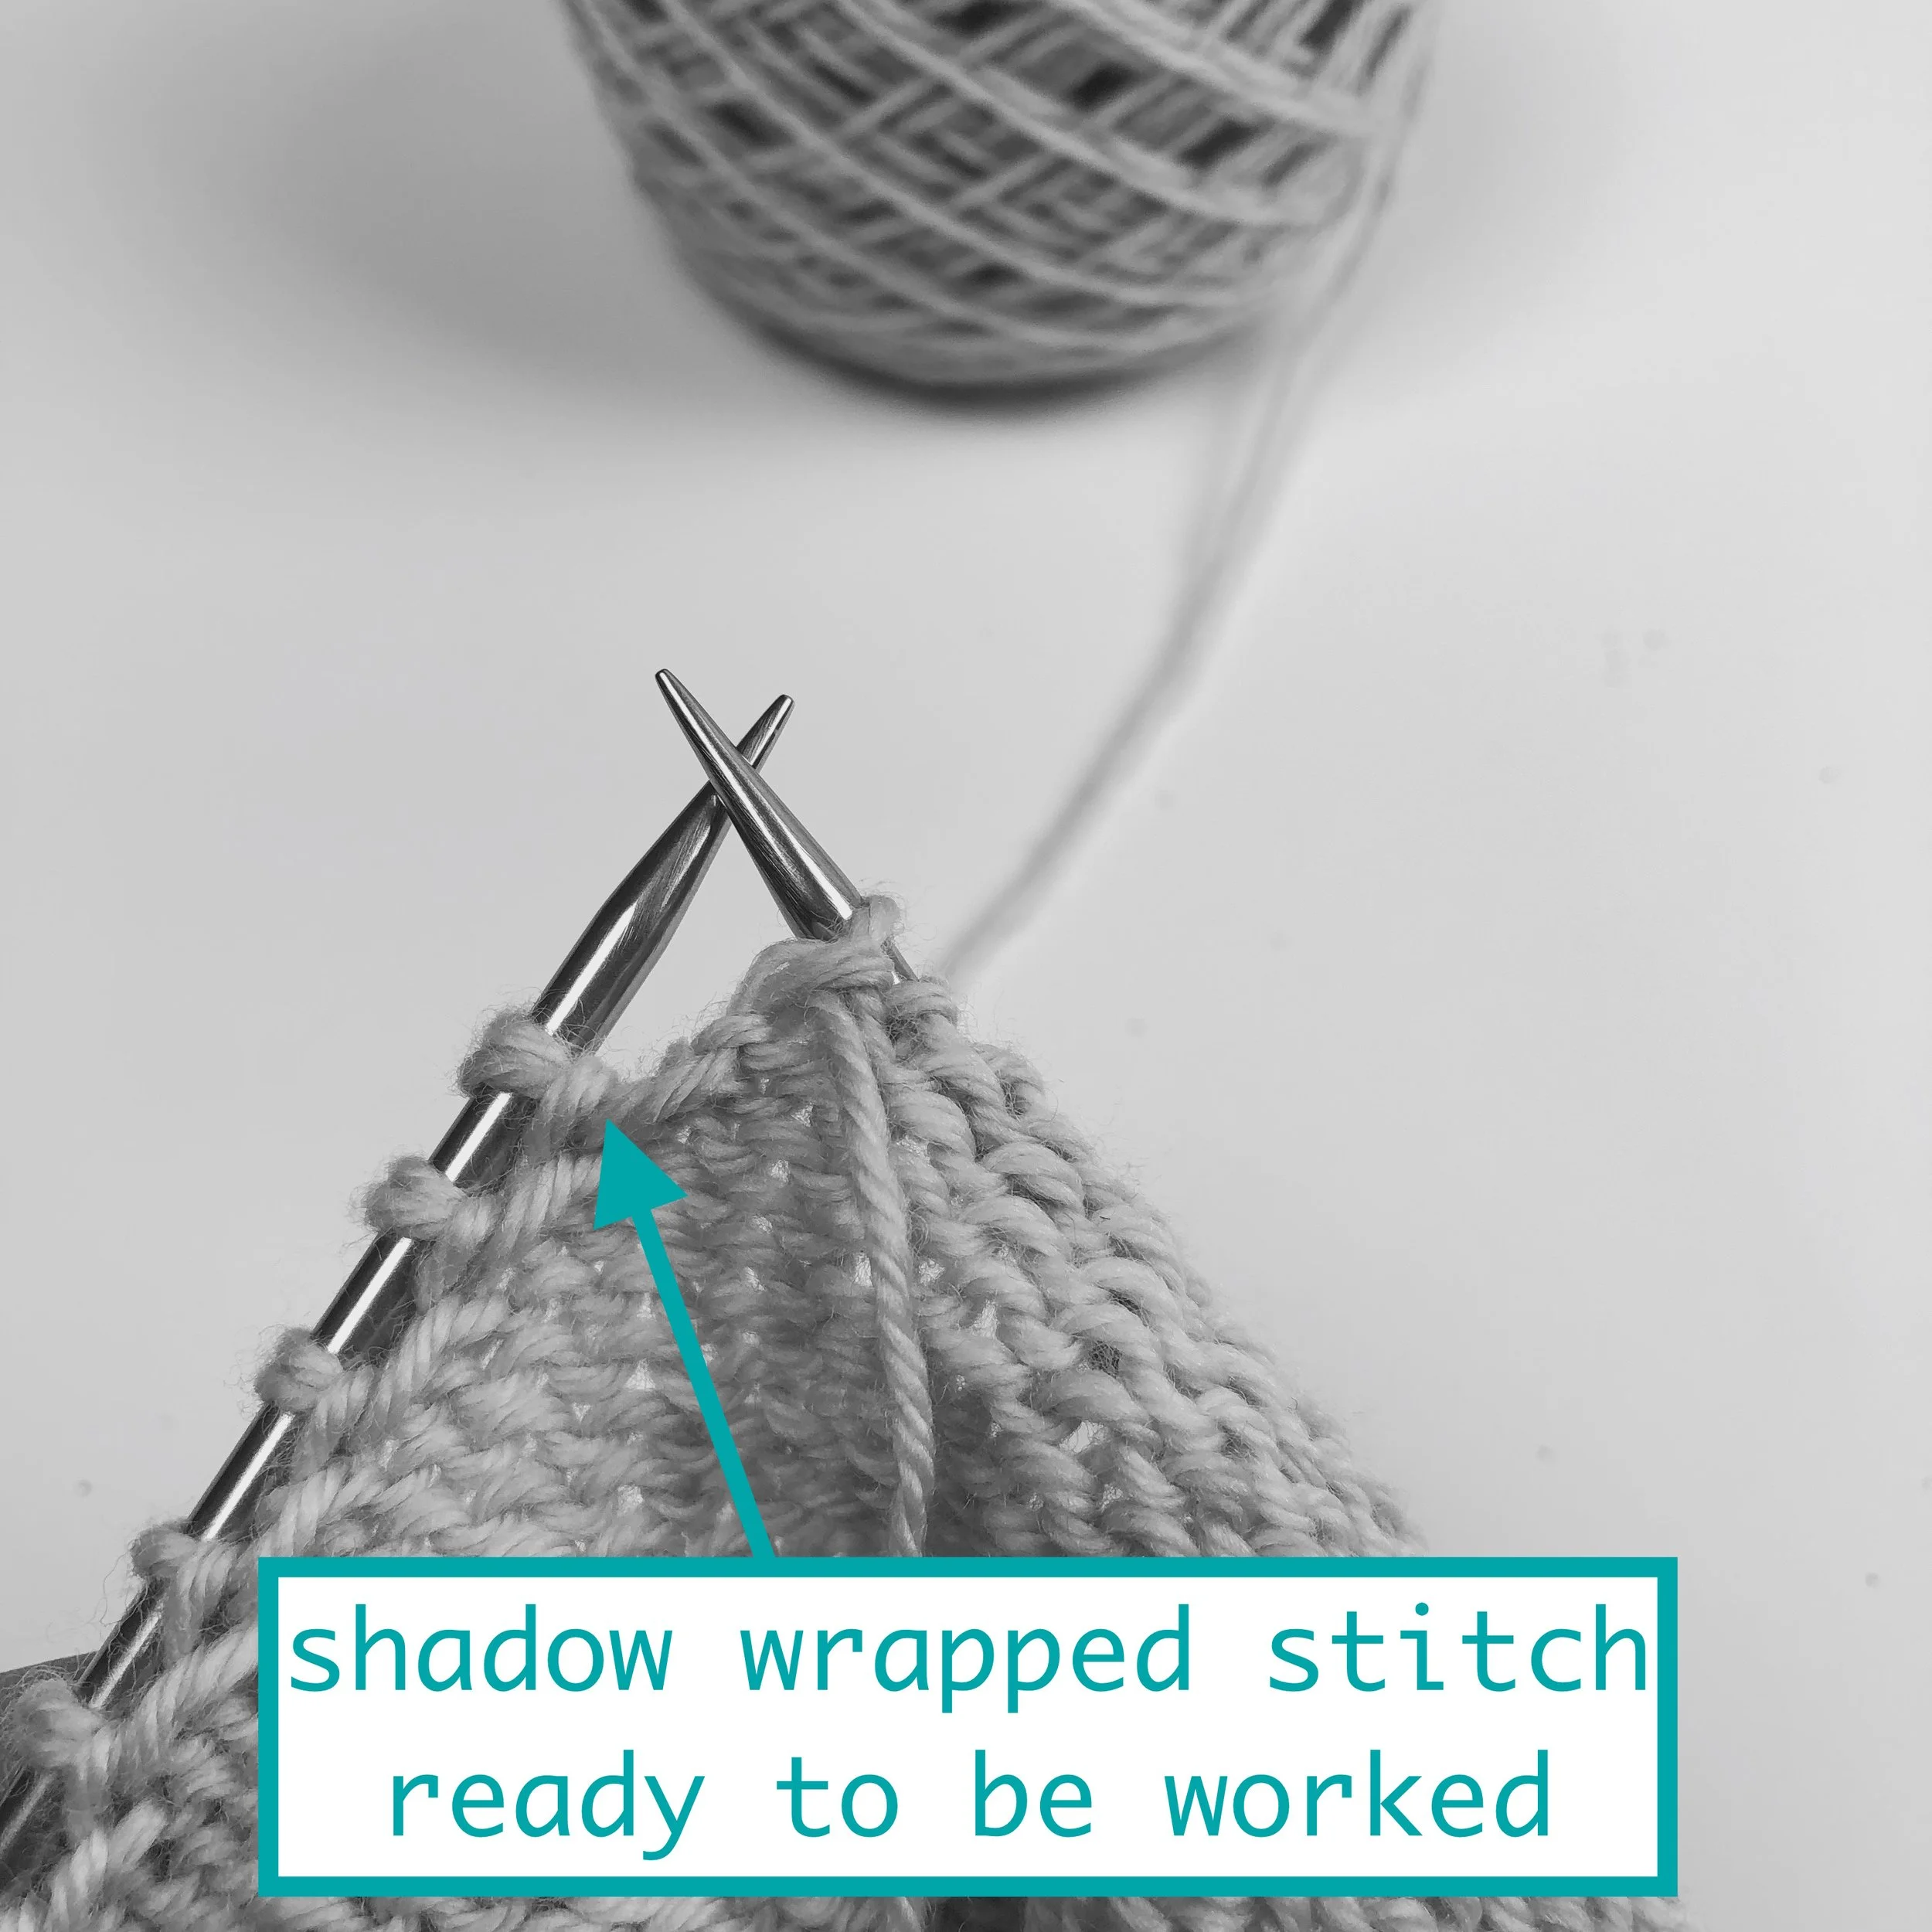
Working the shadow wrap of a purled stitch
The same goes for the purled stitch, all you need to do is purl the two loops of the shadow wrapped stitch together.
I hope you will be as happy with your new short row knitting skills as I have been. I would bet some good yarn, that you will never want to return to another short row method!
